Pages

Wednesday, June 29, 2016

Japanese mini-muumuu

This is not my most flattering garment; instead, it is all about the fabric.  I selected this linen (Nani Iro Nuance) ages ago and loved the painterly print--it looks hand made.  The best way to showcase the large and rather subtle print was with a garment with as few seams as possible.  And since the fabric is Japanese, it is only fitting that I found the right pattern in one of my many Japanese pattern books.
This is the cover of the book.  I purchased it in a small bookstore in Tokyo about 6 years ago, and I can't find an English translation at Amazon.  It's definitely not in English, but instructions are overrated anyhow :)  Here's the photo of the garment in the book:
While being super simple, the pleat detail in the front is lovely and it fits the garment slightly through the bodice.  Now seeing it in photos, perhaps I'll go back and make the stitches more prominent.
I sewed a size 9 based on measurements and the fit is good.  I did raise the armholes by about an inch, and I could have raised them even more (see below).
The fabric is not soft, but instead of lining the garment, I decided to wear a silk chemise under.  After all, I have to find a use for the La Perla one I "forgot" to send back after purchasing it for "research" for one of my assignments in my Intro to Fashion class :)

This is not a glamorous garment.  Maybe with some accessories?  But it is comfortable!  And it's nice and cool in the summer, even with a silk slip as an added layer.  
I'm glad to have finally used this fabric I've had in my stash for so many years.  And it's triggered two other garments to be made with long-held lengths.  I'd say I'm whittling down my piles of fabric, except that I just placed a big order for more, so really I'm just making room.

Wednesday, June 22, 2016

Shibori dyeing experiments

I finished up my most recent class, Fabric Analysis I, last month.  As an extra credit assignment, we were tasked with trying out several different types of shibori and tie dyeing techniques.  I photoed a bit of the process....

This one is my favorite, called Plangi.  The process is to tightly tie tiny beads (even grains of rice!) in a regular pattern on the fabric and then dye it.  Here, I used pony beads, spaced as closely as I could manage.   The background fabric was dyed yellow first, followed by a dip in teal.

Each circle is about 1" wide.  Our instructor showed us a version that was amazing--super small circles, incredibly close together.  I couldn't even come close!

Another type of Plangi, which is essentially "tie dyeing".  I gathered from the center, placing a bead at regular intervals to make the concentric circles the same width apart.  Again, I dyed the fabric first, followed with teal.

Tritik was a type of resist dye using stitches.  The initial picture isn't very informative, but I sewed six parallel lines of running stitches, which were pulled tightly and wrapped around the fabric. 

Not my favorite version, but I'm also not convinced I did it correctly!

Pleating and Binding was another dyeing effect I tried out.  I used quilting clips, which was perfect for this application (and unaffected by the dyes).   The basic set-up is shown below, with fabric accordion pleated then clipped, but I did three different variations.


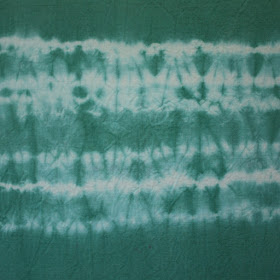
The final type I tried was Arashi Shibori (pole wrapping).  I wrapped a length of fabric around a narrow PVC pipe, then wrapped thread around the pole, evenly spaced.  Then, the fabric was squished toward the end, gathering the fabric.  I dyed the fabric yellow first, followed by teal.

This is the small swatch I submitted, but the rest of the length of fabric was equally beautiful and exciting!
I have to say, this was hands-down the most enjoyable assignment I've ever completed.  It took well over 2 hours, for a very small number of bonus points (which I didn't actually need!), but I loved it all!  I don't typically like the look of tie-dye, but there are some pretty designs that can be made and they might look interesting if used in small amounts in a garment.   Anyhow, I would highly encourage you to try it out for yourselves, if for no other reason than the fun of unwrapping the fabric at the end.  It's like Christmas!  


Friday, June 10, 2016

Leini, the birthday dress

This past week marked the beginning of my last year as a thirty-something.  Eek!  There were several celebratory events (dinners here, here, and here--clearly I enjoy eating!), and for the latter two, I wore this lovely silk dress.
The pattern is from Named, the Leini Dress.  I chose it for the simple design (to blend in better in San Francisco) and elastic waist (see above comment about loving to eat).  
The fabric came from Stonemountain and Daughter at a recent trek to Berkeley.  It was in the 50% off rack, so I snapped up about 3.5 yards of the silk for about $12/ yard.  Such a steal!  The fabric is a bit sheer, so it might be a chiffon.  It was fairly easy to work with, and I hemmed it (successfully!) with a rolled hem foot on my machine.
For this pattern, I went with a straight size 36 based on the measurements.  This was definitely the correct size, however, I did make a few pattern alterations after making a partial muslin and reading other reviews/ seeing photos.  First, I lengthened the bodice by about 2".  As a short person, I have never done this! However, I wanted the waistline to sit a little lower (at the top of my hips), and the elastic on most other versions seemed to be hitting at high waist.   I also chopped off many inches from the length (maybe 5-6"?) to make it a bit more youthful looking (see comment about being 39 this year).   The last alteration to the pattern was to line the skirt; since the fabric was fairly sheer and light, another layer made it a bit more modest (and swishy!).


The bodice pleating is a subtle design feature (at least when paired with this fairly wild print).
Overall, a great pattern and dress--perfect for date night at fancy (and not-so-fancy) places and very comfy, too!  I'd definitely like to make another in a solid navy or berry colored silk crepe.


Monday, June 06, 2016

Visit to Spoonflower!

Brother-in-law, sister-in-law, and myself at the Spoonflower headquarters!
A couple weeks ago, I had the opportunity to travel to North Carolina.  My husband was competing in the Masters National Championship cycling race, and we were taking an extra-long weekend to spend time with his sister and brother-in-law who live in the area.  After hearing all semester long from my Fabrics Analysis instructor about all the fabric weaving and printing facilities in the Raleigh-Durham area, I contacted Spoonflower for a tour.  (I also contacted Cone Denim, and they completely ignored my request.  Bummer.)
Fabric samples stretched on hoops.
Spoonflower was amazingly gracious!  Our lovely tour guide explained their digital printing and transfer printing processes, as well as showing us how their custom prints are cut and prepared for shipment.  It was a surprisingly small facility for all the work they do!  

I wasn't allowed to take photos of the actual printers (to protect the fabric designer's work), so I have few images to show for our time there. What I lack in photos, I can make up for with technology: looks like Google Street View has toured the facility, too!  As you can imagine, the place was decked out in custom printed upholstery, wall coverings, and accessories!  Check out the virtual tour:


If you have the chance to get out to Raleigh-Durham, definitely schedule a tour of Spoonflower!